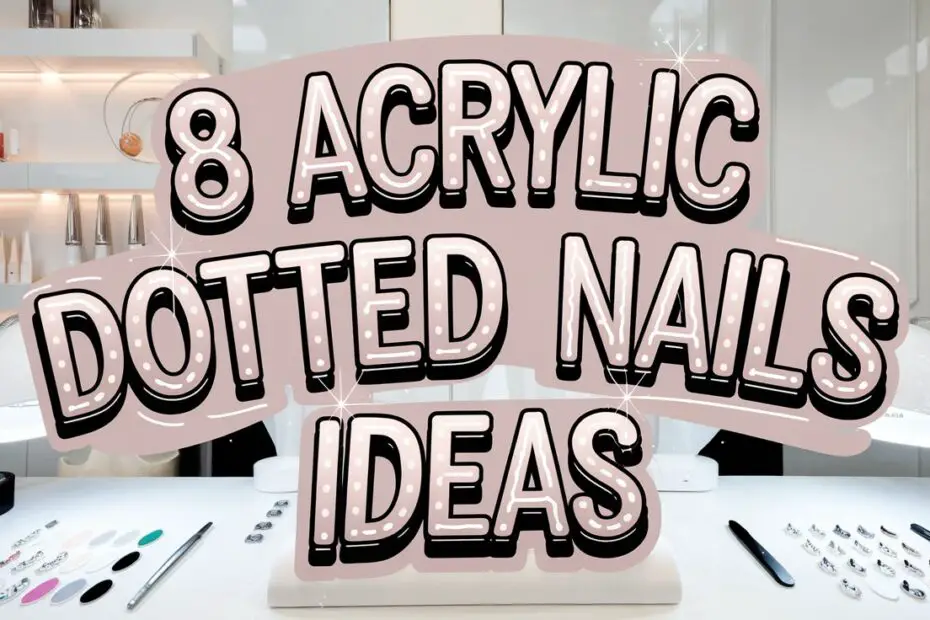
Okay, bestie, let’s have a real conversation about ACRYLIC. And no, I don’t mean the paint your cousin uses for their Etsy shop. I mean ACRYLIC NAILS. The structured, sculpted, absolutely slayin’ extensions that transform your natural nails into canvases worthy of gallery exhibitions.
And when you combine that acrylic foundation with POLKA DOTS? We are entering a new dimension of nail artistry. We are breaking through the ceiling of what’s possible. We are ascending.
Acrylic dotted nails are not just a manicure choice. They’re a lifestyle declaration. They’re saying “I have the length, I have the structure, and I have the AUDACITY to decorate this architectural masterpiece with tiny circles.”
Because that’s what acrylic gives you — architecture. Your nail tech isn’t just painting polish; they’re sculpting a form, building a shape, creating a structure that will hold your dot designs with the strength of a tiny fortress.
I know the acrylic journey. I’ve been there. The first time I got acrylics, I felt like I’d been given superpowers. Suddenly I could open soda cans without breaking a nail. I could tap my phone screen with AUTHORITY.
I could gesture during arguments with the kind of hand movements that made people listen. (Okay, they probably listened because I was being loud, but the nails HELPED. They contributed to the vibe.)
And the DOTS, bestie. The dots on acrylic nails hit DIFFERENT. There’s more real estate. More curve to the nail bed. More opportunity for creative placement that follows the natural arch of a beautifully sculpted almond or the bold statement of a stiletto.
Your nail tech can create dot patterns that flow with the nail’s shape, dots that accentuate the length, dots that make people wonder if you have a personal nail artist on retainer. (You don’t need one. Any good nail tech can do this. But let them wonder. Mystery is power.)
The struggle of short natural nails trying to accommodate complex dot art is REAL. I know it. You’ve tried to paint dots on your natural nails and they end up looking like sad little blobs that smudge before they dry.
Acrylic solves that. Acrylic says “not today, smudge. Not today, short nail beds. Not today, reality.” Acrylic gives you the space and the structure to let your polka dot dreams run wild.
So I’ve assembled EIGHT absolutely fire acrylic dotted nail designs that range from subtle elegance to full-on statement pieces. These are not beginner press-on vibes. These are “I sat in the salon for two hours and it was worth every minute” vibes.
These are “my hands look expensive and my DMs are full of nail questions” vibes. If you’re ready to commit to the acrylic life and the dot life simultaneously? Bestie, welcome home. Your nail journey is about to level up in ways you didn’t know were possible.
Let’s sculpt. Let’s dot. Let’s SLAY. 💅✨
1. Structured French Dot Tips (That Make Regular French Manicures Want To Retire)
A perfectly sculpted hand with long, almond-shaped acrylics rests against a white marble vanity, the morning light streaming through sheer curtains. Each nail features the most impossibly perfect French tip — but instead of a solid white edge, the tip is composed of densely packed micro-dots that create a scalloped, almost lace-like boundary between the nude pink base and the free edge. The acrylic structure gives the nails a graceful, natural arch that makes the dot pattern look almost three-dimensional, like tiny white beads sewn onto silk. The hand reaches for a gold-handled brush, and the movement is so elegant it belongs in a perfume commercial.
When I tell you that French dot tips on ACRYLIC are the pinnacle of nail refinement, I am not being dramatic. (Okay, I’m always slightly dramatic. It’s part of my brand. But in this specific instance, the drama is WARRANTED.) The combination of a perfectly sculpted acrylic base with meticulously placed dot work at the tip creates something that transcends “cute nails” and enters “is that nail art or is that jewelry?” territory.
I first saw this design on a bridal nail inspiration board and I had to wipe away a tear. It was that beautiful. The way the micro-dots at the free edge created this delicate, almost filigree effect against the smooth acrylic surface? It was like someone had taken Victorian lace and shrunk it down to nail size. Romantic. Timeless. Absolutely to die for.
The acrylic structure is what makes this work, bestie. On natural nails, you might get a week of this perfection before growth lines appear and the magic fades. But acrylic? Acrylic holds that flawless tip shape for WEEKS. The dots stay crisp. The arch stays elegant. The overall effect remains “freshly manicured bridal elegance” long after your actual wedding day. (Or your Tuesday. You don’t need to be getting married to deserve bridal-level nails. That’s a rule I just made up, and I’m enforcing it strictly.)
This design has been absolutely everywhere in the “clean girl” and “quiet luxury” aesthetics, particularly among influencers whose entire brand is “effortlessly expensive.” And honestly? It works. There’s something about micro-dot French tips that whispers “old money” without screaming “I spent my rent money on my hands.” It’s the kind of manicure that looks like it belongs on someone who summers in the Hamptons and knows how to sail. Even if you, like me, summer on your fire escape and your sailing experience is limited to watching Titanic.
How to Style It:
- Acrylic base: Pink or clear acrylic with a nude gel overlay like “Bubble Bath” or “Sheer Legs” — the natural nail look is essential for the French illusion
- Dot technique: White gel paint applied with a micro-dotting tool at the free edge, creating a dense cluster of tiny dots that form the “tip” illusion. The acrylic length gives you enough space to really build that scalloped density. Hack: use a French tip sticker as a guide, then fill in the tip area with dots rather than solid color
- Complementary accessory: Pearl stud earrings, a delicate gold chain, or a silk scarf. Think “I was supposed to be born in a different era but I’m making this one work”
- Difficulty level: Intermediate to advanced because micro-dot consistency requires practice. Looks hard AF but trust me, you’ve got this. Acrylic gives you a smooth canvas that makes dot placement significantly easier. Trust the structure. Trust the process.
📸 Picture This: You’re signing the guest book at an upscale wedding, your acrylic French dot tips catching the candlelight as you write. The bride’s mother — who definitely has opinions about everything — pauses her conversation to compliment your “exquisite taste in nail art.” You accept the compliment with practiced grace, knowing your nails just passed the most rigorous aesthetic judgment possible. Bridal mother approval. ACHIEVED.
2. 3D Bubble Dot Acrylics (That Look Like Your Nails Are Wearing Tiny Ball Gowns)
Hands with dramatically long coffin-shaped acrylics hold a champagne coupe at a New Year’s Eve gala. Each nail features a glossy nude base adorned with CLEAR acrylic dots that have been built UP from the nail surface, creating actual three-dimensional bubbles that catch light from every angle. The 3D dots vary in size from tiny pinpricks to dramatic gumball-sized orbs, arranged in cascading patterns that make the nails look like they’re studded with glass beads or water droplets. When the hands move, the clear 3D dots refract light like tiny prisms, creating rainbow flashes that make nearby guests literally stop mid-conversation to stare.
BESTIE. 3D BUBBLE DOTS. I need you to understand that when I first saw these, I lost my entire sense of reality. I didn’t know nails could DO this. I thought dots were FLAT. I thought they were PAINTED. I didn’t know we could BUILD them into ACTUAL PHYSICAL STRUCTURES on top of acrylic nails. The innovation! The engineering! The sheer audacity of turning a nail into a sculpture!
Clear acrylic dots built up on top of a base create this incredible effect where the dots look like water droplets, glass beads, or bubble wrap that somehow became elegant. The dimensionality is what makes it magical — your nails don’t just have a pattern, they have TEXTURE. They have PHYSICALITY. People don’t just LOOK at these nails; they want to TOUCH them. (Establish boundaries, bestie. Your 3D dots are art, not public property.)
The technique requires a skilled nail tech who understands acrylic sculpting. Each dot is formed by placing a small bead of clear acrylic on the nail and allowing it to self-level into a dome before it cures. The result is smooth, glossy, bulbous dots that look like they were blown from glass. On a long acrylic nail? The effect is even MORE dramatic because there’s more space for the bubbles to cascade and cluster.
This design went absolutely VIRAL after a K-pop idol wore a variation to an awards show, and suddenly everyone wanted “bubble nails.” The trend has evolved since then, with nail artists experimenting with colored acrylic bubbles, encapsulated glitter inside bubbles, and even bubbles-within-bubbles for Inception-level nail art. But the classic clear bubble dots on nude acrylic? That’s the foundation. That’s where the magic starts.
These are STATEMENT nails. These are “I am here, I am fabulous, and yes you WILL be talking about my hands later” nails. They’re not for wallflowers. They’re not for shrinking violets. They’re for the bold, the creative, the “I saw it on TikTok and now I’m living it” brave souls who refuse to let their nails be boring.
How to Style It:
- Acrylic base: Clear or natural pink acrylic sculpted to your preferred length and shape — coffin or stiletto work best for maximum bubble drama
- Dot technique: Clear acrylic applied in small beads directly onto the finished nail surface, allowed to dome naturally before curing. Size variation is key — mix tiny micro-bubbles with statement orbs. Hack: dip your brush in monomer, pick up a small bead of clear powder, place and pat. The self-leveling properties of acrylic do the rest
- Complementary accessory: Keep jewelry minimal because the NAILS are the jewelry. Maybe one delicate ring so people have an excuse to look at your hands even closer
- Difficulty level: Advanced — this is professional nail tech territory. Looks hard AF and honestly? It IS hard AF. But you’ve got this because you’re going to a PROFESSIONAL. You don’t DIY 3D acrylic bubbles. You commission them like the art they are.
📸 Picture This: You’re at a rooftop New Year’s party, holding a sparkler, and every time you move your hand the 3D bubble dots catch the ambient light and create tiny rainbow prisms that dance across the surrounding faces. Someone films it for TikTok. The video gets 2 million views. You become “the bubble nail girl” in the comments. You lean into it. You start planning your next bubble design. This is how nail obsessions are born, bestie. This is the origin story.
3. Sculpted Almond Dot Cascade (That Flows Like Water Down Your Nails)
Hands with long, gracefully curved almond acrylics trace the rim of a ceramic wine glass at an intimate dinner party. The nails feature a gradient base that shifts from deep navy at the cuticle to soft periwinkle at the tip, with perfectly placed silver metallic dots that cascade down each nail in decreasing size — largest near the cuticle, smallest at the free edge. The almond shape of the acrylic creates a natural flow that guides the eye along the dot cascade, and the metallic dots catch candlelight like tiny sequins sewn onto silk. The overall effect is fluid, elegant, and mesmerizing — like each nail captures a moment of falling rain frozen in time.
There is something deeply satisfying about a design that follows the natural geometry of the nail, and the sculpted almond dot cascade is the PERFECT example of form meeting function meeting absolutely slayin’ aesthetics. The almond shape — that gentle taper from a wide cuticle to a rounded point — creates this beautiful visual runway that just BEGS for a cascading pattern. And dots, bestie? Dots are the ideal medium for that cascade.
I saw a nail artist create a dot cascade using chrome powder dots over an ombre acrylic base, and I felt like I was watching someone paint a masterpiece in real-time. The way they placed each dot with consideration for the nail’s curve, the way the sizes graduated to emphasize the almond taper, the way the metallic finish caught light differently at each point along the cascade? It was mesmerizing. It was meditative. It was the kind of nail art that makes you want to quit your job and enroll in nail school immediately.
The acrylic foundation is essential here because the almond shape needs to be SCULPTED, not just filed from a natural nail. A proper almond acrylic has that perfect arch, that smooth sidewall curve, that elegant free edge that looks like it was designed by an architect rather than just grown. And when you add a dot cascade that follows those lines? It’s harmony. It’s poetry. It’s “my hands belong in an art museum and I will be writing strongly worded letters until they are accepted.”
This design has been trending among the “night out” and “event” crowds because it photographs beautifully from every angle. The cascading dots create movement even in still photos. The metallic or chrome elements catch flash photography like tiny mirrors. It’s Instagram gold. It’s TikTok catnip. It’s the kind of nail content that racks up saves and shares because people NEED to remember this design for their next salon visit.
How to Style It:
- Acrylic base: Custom-blended ombre acrylic from navy to periwinkle, or choose any two-tone fade that speaks to your soul — burgundy to blush, emerald to mint, black to gray. The world is your ombre oyster
- Dot technique: Using a graduated dotting tool set, place the largest dots near the cuticle area and progressively smaller dots as you move toward the tip. Space them evenly along the center axis of the nail to emphasize the almond flow. Hack: map your cascade with a pencil first, then go over the marks with your gel or acrylic paint
- Complementary accessory: A sleek clutch in a matching metallic tone, or drop earrings that pick up the dot color. Coordinate, don’t compete
- Difficulty level: Intermediate because size graduation requires planning, but acrylic’s smooth surface makes placement easier. Looks hard AF but trust me, you’ve got this. The nail’s natural shape is your guide. Trust the almond. The almond knows.
📸 Picture This: You’re at a gallery opening, wine in hand, discussing the abstract expressionist piece on the wall with genuine passion. As you gesture toward the canvas, your silver dot cascade nails catch the gallery spotlights and create their own light show. The artist — the ACTUAL ARTIST whose work you’re discussing — interrupts to ask about your manicure. You just became art criticism AND nail art inspiration in the same evening. Multifaceted queen. That’s you.
4. Acrylic Encapsulated Dot Treasures (That Turn Your Nails Into Tiny Museum Cases)
Hands with medium-length square acrylics cradle a vintage locket, the nails revealing their secret: inside each clear acrylic nail, perfectly preserved among the transparent layers, are tiny polka dots of glitter, dried flower petals, and iridescent mylar flakes. The encapsulation makes the decorative elements look suspended in glass, like biological specimens or precious artifacts preserved for eternity. From a distance, the nails look like clear glossy perfection. Up close, they’re WORLDS — tiny universes of dots and sparkles trapped inside acrylic architecture. The hand opens the locket, and the parallel between preserving memories in jewelry and preserving beauty in nails is suddenly, profoundly clear.
Encapsulated nails are where acrylic technology truly becomes MAGIC, and when you encapsulate DOTS — actual dot-shaped decorations sealed inside clear acrylic layers? Bestie, we are no longer doing nail art. We are doing NAIL PRESERVATION. We are curators. We are conservators. We are saying “this dot is important enough to trap in clear acrylic for the next three weeks.” And honestly? Every dot deserves that level of respect.
I first saw encapsulated dot treasures at a nail competition (yes, those exist, and yes, they’re as intense as you imagine) where a technician had placed tiny holographic dot sequins inside clear acrylic, then built the nail around them. The result was this incredible depth — the dots seemed to float at different levels within the nail, creating a 3D effect that changed as you moved your hands. It was like wearing tiny snow globes. It was like having museum pieces on your fingertips. It was genuinely moving. (I get emotional about nails. We’ve established this. Moving on.)
The technique involves placing your decorative dots or elements onto the natural nail (or a thin acrylic base), then building clear acrylic over and around them to seal them inside. The clear layers create a viewing window, a protective case, a permanent display for whatever tiny treasures you’ve chosen. Glitter dots, colored mylar dots, even tiny hand-painted dots on a thin plastic film — all of it can be encapsulated and preserved.
This trend has been HUGE among the “memory nail” community, where people encapsulate meaningful items — a dot of their wedding invitation color, a tiny pressed flower from a special date, a bit of glitter from a celebration. But even without the sentimental angle, encapsulated dot treasures are visually stunning. They’re conversation starters. They’re “wait, are those INSIDE your nail?” moments that make people lean in and stare with fascinated wonder.
How to Style It:
- Acrylic base: Clear acrylic over a thin natural-tone base layer — the clearer the encapsulation, the more visible your treasures
- Dot technique: Place your decorative elements (glitter dots, mylar shapes, tiny rhinestones arranged in dot patterns) onto a thin uncured acrylic layer. Build clear acrylic over them in thin layers, curing or allowing to set between applications. File and shape to reveal your treasures at different depths. Hack: use a dot of glue to position elements exactly where you want them before encapsulating — they can shift during acrylic application if not anchored
- Complementary accessory: Clear or Lucite jewelry that echoes the “trapped treasure” aesthetic. Think modern, architectural, slightly futuristic
- Difficulty level: Advanced — this is absolutely professional territory. Looks hard AF and honestly IS hard AF, but you’ve got this because you’re going to a nail artist who trained for this. Trust your technician. They are the encapsulation wizard. You are the canvas. Together, you create magic.
📸 Picture This: You’re at a pool party, your hands resting on the water’s surface as you float on an inflatable lounger. The sunlight penetrates your clear encapsulated nails and illuminates the glitter dots inside, making your fingertips look like they’re glowing from within. Someone underwater looks up and sees your nails creating prismatic light patterns on the pool floor. You become a LEGEND at this pool. “The girl with the galaxy nails.” Years later, people still talk about them. This is the power of encapsulation, bestie. This is immortality, nail-style.
5. Matte Stiletto Dot Contrast (That Proves Dangerous Nails Can Also Be Playful)
Hands with dramatically pointed stiletto acrylics grip the handle of a motorcycle helmet, the nails creating a visual paradox: the shape says “dangerous, edgy, don’t mess with me,” but the matte nude base with soft pink polka dots says “actually, I have a sweet side and I make excellent cupcakes.” The contrast is jarring in the best way — sharp stiletto points softened by round, playful dots. The matte finish absorbs light while the pink dots sit slightly glossy, creating subtle texture variation. It’s the nail equivalent of wearing combat boots with a sundress. It’s unexpected. It’s iconic. It’s main character energy with a twist.
Stiletto nails are already a STATEMENT. They say things before you even open your mouth. They say “I am bold.” They say “I am not afraid to open a soda can with a knife if necessary.” They say “my nail tech has a PhD in structural engineering.” And when you combine that bold shape with something as traditionally sweet and playful as POLKA DOTS? Bestie, you’ve just created narrative tension. You’ve written a story with your hands. You’ve become unpredictable, and unpredictable is ALWAYS interesting.
I saw matte stiletto dot nails on a fashion influencer who was known for mixing hard and soft aesthetics — leather jackets with floral dresses, combat boots with pearl necklaces — and it clicked INSTANTLY. OF COURSE her nails would be sharp and dangerous with round, cute dots. Of COURSE. It’s the aesthetic contradiction that makes her style compelling, and her nails were the perfect microcosm of that entire philosophy.
The matte finish is key here. If these dots were on glossy stilettos, they’d read more “pin-up” or “retro.” But matte? Matte changes the entire conversation. Matte says “modern.” Matte says “editorial.” Matte says “I saw this in a high-fashion magazine and I’m making it accessible.” The combination of matte base with slightly glossy dots (achieved by using gel for the dots and matte top coat only on the base) creates this sophisticated textural interplay that feels expensive and intentional.
Acrylic is non-negotiable for stiletto shape, bestie. Natural nails cannot support this length and point without breaking, peeling, or staging an outright rebellion. Acrylic gives the stiletto its strength, its structure, its ability to exist without constant fear of snapping. And with that structural security, you can decorate with dots to your heart’s content.
How to Style It:
- Acrylic base: Natural pink or nude acrylic sculpted to a sharp, dramatic stiletto point — the longer, the more dramatic the dot contrast
- Dot technique: Matte gel top coat over the entire nail first, then glossy gel dots placed using a medium dotting tool. The gloss dots will sit on top of the matte base, creating that textural contrast. Space them randomly for playful energy, or in a grid for unexpected structure-meets-play contrast. Hack: use a matte top coat with a slightly different undertone than your base color for extra depth — warm nude base with cool-toned matte top coat, for example
- Complementary accessory: Mixed metal jewelry, or a leather jacket over a feminine dress. Commit to the aesthetic contradiction fully. Don’t half-ass the duality. Whole-ass it
- Difficulty level: Intermediate because stiletto shaping requires skill, but dot application is straightforward. Looks hard AF but trust me, you’ve got this. The pointy nails do half the work by being inherently dramatic. The dots just add personality.
📸 Picture This: You’re striding through a music festival crowd, stiletto nails glinting in the stage lights as you raise your hand to cheer. The person next to you does a double-take — first because your nails are SHARP, then because they have PINK DOTS. They laugh. You laugh. You become best friends for the next three songs. All because your nails told a story that made someone smile. That’s the power of playful contradiction, bestie. That’s the magic of dots on stilettos.
6. Long Coffin Dot Gradient (That Makes Your Nails Look Like A Sunset You Can Touch)
Hands with impeccably long coffin-shaped acrylics frame a sunset view from a beach bonfire. The nails feature a gel-polish ombre that transitions from deep coral at the cuticle through peach and apricot to pale champagne at the free edge. Over this warm gradient, rose gold metallic dots increase in size from barely-visible pinpricks near the cuticle to bold statement dots near the tip. The coffin shape provides a wide, flat canvas that showcases the full gradient and dot progression, and the rose gold catches firelight like tiny embers floating on a sunset sky. The overall effect is warm, inviting, and absolutely mesmerizing — like holding the end of a perfect summer day on your fingertips.
Coffin nails — also known as ballerina nails, for their resemblance to a slipper box — are the ULTIMATE canvas for gradient dot designs. That wide, flat free edge? That long, straight sidewall? It’s like your nail tech was given a rectangular painting surface and told to create something beautiful. And when they create a gradient with dots that follow that gradient? It’s art. It’s pure, unadulterated, “hang this in the Louvre (but smaller)” ART.
I saw a long coffin dot gradient in shades of purple — deep plum to lavender to pale lilac — with silver dots that got progressively larger toward the tip, and I had an out-of-body experience. I astral projected. I visited another plane of existence where everything is beautiful and nothing hurts. Then I came back to my body and immediately saved the photo to three different Pinterest boards. That’s the power of a well-executed gradient dot design on coffin acrylics.
The acrylic structure allows for LENGTH, and length is what makes the gradient truly breathtaking. On short nails, a gradient can feel rushed, compressed, like trying to tell an epic story in a tweet. But on long coffins? The gradient breathes. It has space to transition. It has room for the dots to tell their size-progression story. It’s the difference between a haiku and a novel, and both are valid, but the novel gives you MORE.
This design has been absolutely EVERYWHERE in summer nail content, particularly in warm coral-to-champagne or ocean blue-to-aqua variations. It’s giving beach vacation. It’s giving golden hour. It’s giving “I have a margarita in my hand and nowhere to be tomorrow.” And even if you’re not on vacation, even if you’re just sitting in your apartment with a grocery store margarita mix? Your nails can transport you. That’s the power of good design.
How to Style It:
- Acrylic base: Clear or natural pink acrylic sculpted to long, dramatic coffin shape — the flatter the free edge, the better your gradient canvas
- Dot technique: Create your gel ombre base first (sponge method works beautifully over acrylic), cure completely. Then use graduated dotting tools to place dots that increase in size from cuticle to tip. Keep the dot color metallic or chrome for maximum impact against the gradient. Hack: use the same sponge you used for the ombre to lightly dab metallic pigment over some dots for extra shine variation
- Complementary accessory: Gold body jewelry, layered necklaces, or anything that catches light the way your metallic dots do. Be a human disco ball. It’s your right
- Difficulty level: Intermediate to advanced because ombre over acrylic and graduated dot sizing both require practice. Looks hard AF but trust me, you’ve got this. Your nail tech is an artist. You are the gallery. Together, you create exhibitions.
📸 Picture This: You’re on a beach at golden hour, toes in the sand, taking that obligatory “holding a drink with the sunset in the background” photo. Your long coffin gradient dot nails enter the frame, and they don’t just complement the sunset — they COMPETE with it. The photo gets posted. It gets saved 50,000 times. People comment “nails OR sunset?” and the correct answer is “BOTH.” You become a summer aesthetic icon. Your nail tech gets booked solid for months. Everyone wins.
7. Reverse French Dot Arches (That Flip The Script And Make It Fashion)
Hands with medium-length oval acrylics rest on a velvet theater seat armrest, the nails showcasing the most clever twist on a classic: instead of dots at the tip, each nail features a dense arc of dots along the CUTICLE area, creating a reverse French manicure that draws attention to the nail’s base rather than its end. The dots graduate from tiny near the sidewalls to larger near the center, creating a scalloped crescent that frames the nail bed like a decorative border. The base color is a sheer, glowing peach that looks lit from within, and the dots are pearlescent white that catches the dim theater light like tiny stage spotlights. The overall effect is theatrical, unexpected, and absolutely captivating — like your nails are wearing their own tiny tiaras.
Reverse French anything makes me feel like I’m in on a secret that the rest of the nail world hasn’t fully discovered yet. It’s SUBVERSIVE. It’s “I know the rules, and I’m choosing to break them stylishly.” And reverse French dot ARCHES? That’s not just breaking rules. That’s writing new ones. That’s saying “why should the tip get all the attention when the cuticle area is RIGHT THERE, being completely ignored?”
I first saw reverse dot arches on a Broadway performer’s Instagram (they’d gotten them for an opening night, because OF COURSE Broadway people have the most theatrical nails) and I was enchanted. The way the dots framed the cuticle created this almost crown-like effect. It made the nail bed look longer, more elegant, more INTENTIONAL. Like the dots were saying ” behold, here is a nail worth noticing from BASE to TIP.”
The acrylic foundation allows for that perfect oval or almond shape that makes the reverse arch really sing. On square nails, the effect would be more geometric, more modern. But on a soft oval? It’s romantic. It’s delicate. It’s “I might burst into song at any moment” energy. And whether or not you actually burst into song (your choice, bestie, no judgment), the nails set that tone.
This design works beautifully for people who type a lot or use their hands actively, because the decoration is at the BASE of the nail rather than the TIP where it might chip or wear. Practical AND beautiful? That’s the dream. That’s the goal. That’s what acrylic with dot arches delivers.
How to Style It:
- Acrylic base: Sheer peach or pink acrylic with a glowing, translucent quality — you want that “lit from within” base effect
- Dot technique: Using a graduated dotting tool set, place the largest dots at the center of the cuticle area, then progressively smaller dots as you curve toward the sidewalls. Create a symmetrical crescent that mirrors the natural curve of your cuticle. Hack: use a curved nail sticker as a placement guide, then remove before curing your final dot layer
- Complementary accessory: Vintage-inspired jewelry — cameo brooches, pearl strands, art deco rings. The reverse arch has old Hollywood energy and your accessories should match that glamour
- Difficulty level: Intermediate because symmetrical arcs require steady hands and good spatial awareness. Looks hard AF but trust me, you’ve got this. Acrylic provides a smooth, consistent surface that makes placement much easier than natural nails. Trust the canvas.
📸 Picture This: You’re at a theater intermission, standing in the lobby with a glass of champagne, and someone across the room notices your nails because the lobby lights hit those pearlescent reverse arch dots just so. They make their way over, compliment your “absolutely ingenious” manicure, and you spend the rest of intermission discussing nail art philosophy. The second act begins, but you’re still thinking about dots. The performance was good, but the nails? The nails were the main event. As they should be.
8. Acrylic Negative Space Dot Windows (That Let Your Natural Nail Peek Through In The Cutest Way)
Hands with sculpted square acrylics hold a minimalist ceramic coffee cup in a bright, airy café. The nails feature a clever design where the acrylic forms a “frame” around the natural nail, with the center of each nail left clear or painted sheer, creating negative space “windows” that reveal the nail beneath. Inside these windows, tiny dots in varying colors float like confetti trapped in glass. The acrylic frame is crisp white, the natural nail visible through the center provides warmth and realism, and the dots add playful pops of color that make each window feel like a tiny abstract painting. The overall effect is modern, architectural, and utterly charming — like wearing miniature stained glass panels on your hands.
Negative space nail art is already a masterclass in restraint and creativity, but doing it on ACRYLIC? With DOTS inside the negative space windows? Bestie, we’ve reached peak “nails as architecture.” This is no longer just nail art. This is tiny construction. This is nail engineering. This is “my nail tech deserves an architecture degree” territory, and I am the president of their fan club.
I first saw negative space dot windows on a Japanese nail artist’s account — they called them “see-through dot frames” — and I spent an embarrassing amount of time trying to figure out how they were constructed. The answer? Clever acrylic work. The technician builds a thin acrylic extension with a deliberate gap or “window” in the center, fills that window with clear or sheer gel, and then paints dots on top of that transparent layer. The result is this incredible illusion that the dots are floating in a clear panel while the acrylic frame holds everything in structural perfection.
This design has been trending among the “minimalist” and “modern art” nail communities because it bridges the gap between natural nail appreciation and acrylic enhancement. You’re not hiding your natural nail entirely — you’re FRAMING it. You’re saying “my natural nail is art, and I’m building a gallery around it.” That’s confident. That’s curator energy. That’s “I understand negative space the way graphic designers understand negative space” sophistication.
The dot placement inside the windows is where the personality comes in. Random multicolor dots give a playful, confetti feel. Uniform monochrome dots feel more editorial and structured. A single dot in the center of each window? That’s MINIMALISM. That’s “less is infinitely more and I’m going to prove it with one perfect circle” energy.
How to Style It:
- Acrylic base: Clear or natural pink acrylic sculpted with deliberate negative space windows — this requires a technician skilled in acrylic architecture and form design
- Dot technique: Fill windows with clear builder gel, cure. Paint or dot your chosen colors inside the windows using gel polish. Cure each color separately. The clear window creates depth while the acrylic frame provides structure. Hack: use thin tape to create perfect window shapes before acrylic application, then remove after shaping for crisp edges
- Complementary accessory: Geometric jewelry, architectural rings, or anything with clean lines and modern angles. Your nails are contemporary art; your accessories should be from the same gallery
- Difficulty level: Advanced — this is absolutely professional-level acrylic sculpting. Looks hard AF and IS hard AF, but you’ve got this because you’re trusting a trained nail architect. Commission this like you would a custom piece of furniture. It IS custom furniture, but for your hands.
📸 Picture This: You’re at a modern art museum, standing before a piece that explores “windows and frames” as conceptual motifs, and you raise your hand to gesture toward the work. Your negative space dot window nails accidentally become part of the exhibition — a visitor photographs your hands alongside the artwork, unable to tell where the art ends and your nails begin. Security doesn’t kick you out because even THEY are impressed. The museum considers acquiring your manicure for their permanent collection. (This hasn’t happened yet, but I’m manifesting it for one of us. Why not you?)
FINAL THOUGHTS
We have JOURNEYED through the world of acrylic dotted nails, bestie, and what a journey it has been. From 3D bubble sculptures to encapsulated treasures to reverse French arches, we’ve explored the absolute pinnacle of what acrylic structure and polka dot creativity can achieve together. And honestly? I feel changed. I feel inspired. I feel like I need to immediately call my nail tech and schedule a three-hour appointment that I absolutely cannot afford but will find a way to finance because LOOK AT WHAT’S POSSIBLE.
Here’s what acrylic teaches us about nail art: structure enables creativity. You can’t build a cathedral on sand, and you can’t create intricate dot masterpieces on nails that bend, break, and peel at the first hint of adversity. Acrylic gives you the FOUNDATION. It gives you length, shape, strength, and a smooth canvas that welcomes complex designs with open arms. And once you have that foundation? The dots you can create are limited only by imagination. (And possibly your budget. But imagination first, budget second. That’s the creative process.)
I know acrylic isn’t for everyone. Some people prefer the natural nail life. Some people can’t handle the length. Some people have jobs where long nails would be genuinely impractical. And that’s ALL valid. But if you’ve been curious? If you’ve been looking at acrylic nail photos with longing in your heart? Let this be your sign. Let this be your permission slip. Let this be the moment you say “yes, I want the structure, I want the length, and I want the DOTS.”
Your hands are capable of wearing art, bestie. Your fingertips can be galleries. Your nails can tell stories, spark conversations, and make strangers smile. Acrylic dotted nails aren’t just a manicure choice — they’re a creative statement. They’re saying “I believe my hands deserve to be beautiful, and I’m willing to invest in that beauty.” Periodt.
Which of these acrylic dotted designs is your soul calling out for? Are you brave enough for 3D bubbles? Sophisticated enough for reverse French arches? Architectural enough for negative space windows? Drop your favorite in the comments, share this with your nail-obsessed crew, and let’s build a world where acrylic and dots live in perfect harmony.
Book the appointment, bestie. Bring these photos. Trust your technician. And prepare for everyone — EVERYONE — to ask for your manicurist’s number. Because they will. They absolutely will. And you’ll smile, hand over the contact, and know that your hands started a movement. 💅✨