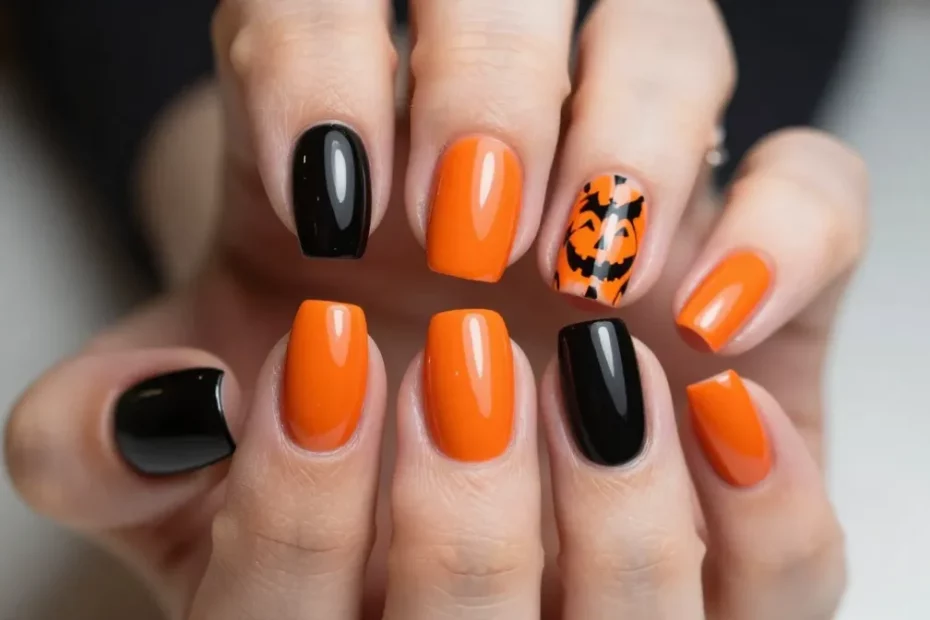
Black and orange nails don’t have to live in October. Done right, they look edgy, sophisticated, and ridiculously photogenic year-round. From glossy lava vibes to soft gradients that melt like a sunset, these designs bring drama without trying too hard. Ready to make your hands the main character?
1. High-Contrast French: Jet Tips With Neon Slices

French tips, but make them punchy. Swap the classic white for inky black tips, then slide in a razor-thin neon orange line right under the smile line. It looks minimal at first glance, then hits with a graphic pop that feels modern and expensive.
This combo flatters every nail length and shape. Shorties get chic definition, and longer almond or coffin shapes look extra editorial.
How To Pull It Off
- Base: Sheer pink or milky nude to keep it clean.
- Tip: Paint a crisp black French using a liner brush or tip guides.
- Accent: Add a hairline stripe of bright orange under the black curve.
- Top: Glossy for shine or velvet matte for that runway finish.
Tips
- Use gel polish for the line work so you can cure each step and avoid smudges.
- Prefer softer vibes? Try a burnt orange instead of neon.
- Go asymmetric: orange stripe on only two nails per hand for editorial restraint.
Wear this when you want something office-appropriate that still gets compliments in the elevator. It reads polished with a whisper of rebellion.
2. Ember Ombre: Smoke-To-Flame Gradient

Think glowing coals fading into midnight. A black-to-orange ombre looks dramatic but surprisingly wearable, especially with a soft blend. You get color without hard lines, and it photographs like a dream.
The trick? Keep the darkest shade near the tips for a flattering elongation. It’s like contouring for your nails.
Materials
- Shades: Matte black, deep burnt orange, and a mid-orange.
- Tools: Makeup sponge, cleansing brush for clean-up, liquid latex (optional).
- Finish: Gloss or velvet matte—both slap, IMO.
Technique
- Apply a sheer nude base and cure/dry.
- Paint stripes of orange and black on a sponge (orange at the cuticle, black at the tip).
- Bounce the sponge onto the nail in light layers, drying between passes.
- Clean edges, then seal with top coat to smooth the gradient.
Want extra depth? Add a faint diagonal of micro-glitter orange over the transition. You’ll get movement without full sparkle overload.
Perfect for nights out, moody selfies, and anyone who refuses to do boring nails ever again.
3. Graphic Negative Space: Angles, Arches, And Little Lightning Bolts

If you love modern art and sharp outfits, this set belongs to you. Use black and orange as bold blocks while leaving sections of your natural nail exposed. The negative space keeps everything airy and sleek.
This design looks pricey with very little effort. Plus, grow-out stays sneaky because the cuticle area stays clear.
Design Ideas
- Diagonal Blocks: Split the nail corner-to-corner—orange on one half, black on the other, clear line down the center.
- Half-Moons: Paint black from the tip downward, leave a negative half-moon at the base, then add a thin orange arc.
- Lightning Bolts: Tiny orange bolt over a sheer base with a black micro-French tip. Cute and edgy.
Pro Tips
- Use striping tape for surgical straight lines. Peel while polish is still wet for crisp edges.
- Choose a semi-sheer base in your skin tone to blur imperfections and flatter the negative space.
- Matte top coat makes graphic shapes look refined and intentional. Gloss reads more playful.
These work for minimalists who still want a statement. They slide from brunch to boardroom with zero effort, seriously.
4. Lava Marble: Molten Swirls With Chrome Flickers

We’re going full drama now. Lava marble nails swirl orange through glossy black like molten rock, and they look custom every time. Add a hint of chrome or foil and the whole set feels artisanal.
Don’t panic—marble looks tricky, but the imperfection is the point. The messier the swirl, the more organic and cool it looks.
What You Need
- Base: Black gel or regular polish.
- Accents: Orange gel, a darker rust orange, and a micro gold or copper chrome powder/foil.
- Tools: Thin liner brush, dotting tool, silicone tool, alcohol for blooming (gel method).
How To Create The Swirl
- Paint two thin coats of black and cure/dry.
- Drop small puddles of bright orange and rust orange in a wave down the nail.
- Feather with a liner brush, then add tiny hits of copper foil or dab chrome at the edges.
- For gel, lightly blur with isopropyl to soften edges before curing.
Seal with a thick top coat to get that glassy, lava-like depth. Add a matte top on one or two accent nails for contrast. Trust me, the texture play feels luxe.
Save this for special events, vacations, or whenever you want strangers to ask where you get your nails done (spoiler: right here, at your desk).
5. Sport-Luxe Stripes: Racer Energy, Runway Finish

Channel varsity jackets and race cars but make it chic. Clean stripes in black and orange scream “sporty cool” without going full costume. Keep the lines crisp and the palette tight for a graphic, editorial set.
This is beginner-friendly because stripes hide minor wobbles. Plus, it grows out nicely and looks great on short nails.
Layout Ideas
- Side Stripes: Two slim vertical lines—one black, one orange—running up one side of each nail.
- Center Track: A wide black stripe down the center with a thin orange pinstripe hugging one edge.
- Number Decal Accent: Add a minimalist “01” or “07” decal on one nail for race-day flair.
Execution Tips
- Start with a soft nude or sheer beige base to let the stripes pop.
- Use striping tape or a long liner brush. Pull the brush in one smooth motion—don’t stop mid-line.
- Finish with a high-shine top coat to sell the sport-luxe vibe.
These nails pair with blazers, sneakers, and everything in between. You’ll get that crisp, athletic energy without trying hard—FYI, it looks amazing in mirror selfies.
Ready to pick your poison? Whether you want understated edge or full molten drama, these black and orange nail ideas deliver serious style with zero seasonal limits. Grab your liner brush, queue your favorite playlist, and paint yourself a tiny masterpiece—your hands deserve the spotlight.