Let me ask you something: why settle for ONE pattern when you can have TWO and look like a walking piece of modern art? (Yes, queen, I’m talking about stripes and polka dot nails, and I need you to understand that this combo is not just a trend—it’s a lifestyle.)
Stripes and polka dots are like the ultimate power couple of the pattern world. Separately, they’re classics. Together? They’re iconic, they’re bold, and they’re giving major “I have strong opinions about graphic design and also incredible taste” energy that is absolutely unmatched.
The thing about combining stripes and polka dots is that it shouldn’t work, but it absolutely does, and that’s what makes it so brilliant. (It’s like pairing sneakers with a ballgown. Controversial to some, but the girlies who get it REALLY get it.)
The straight, structured lines of stripes balance the playful roundness of polka dots, creating a manicure that feels both orderly and fun, serious and whimsical. It’s the nail art equivalent of being a CEO who also knows every TikTok dance—and honestly, that duality? We love to see it.
If you’ve been playing it safe with solid colors or basic patterns, this is your sign to mix things up. Stripes and polka dots together create visual interest that makes people stop mid-scroll, lean in closer, and ask “HOW did you do that?” (Spoiler: it’s easier than it looks, and I’m about to show you exactly how.)
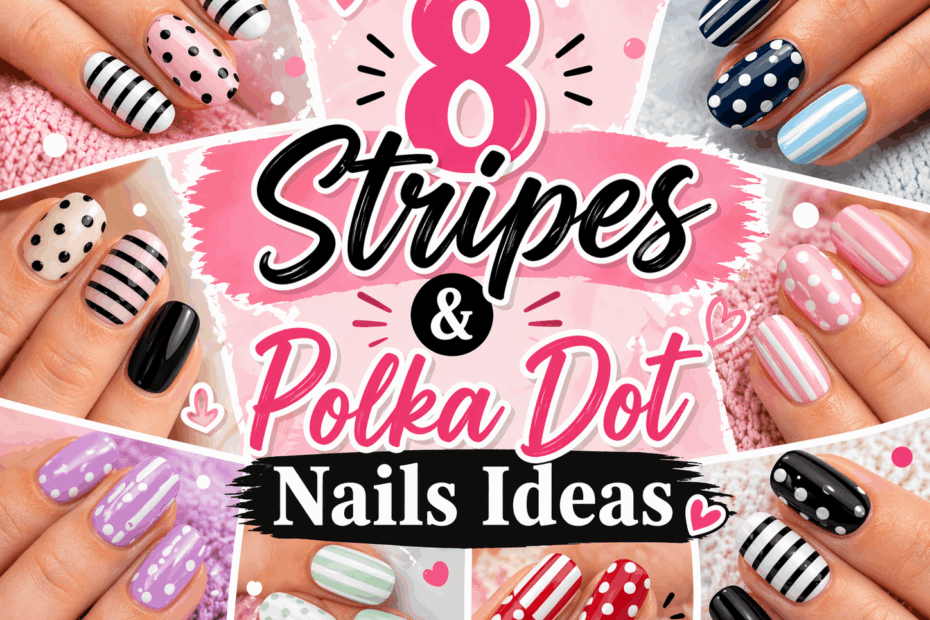
Today, I’m bringing you eight absolutely fire stripes and polka dot nail designs that range from classic and clean to wild and artistic. Grab your striping tape and your dotting tools, because we’re about to get very graphic.
1. Classic Black and White Stripes + Dots (That Are Giving “Graphic Novel Realness”)
A hand with medium-length square nails painted in alternating patterns. The index and pinky fingers feature bold vertical black and white stripes of equal width, perfectly straight and satisfyingly crisp. The middle and ring fingers show a solid white base covered in perfectly uniform black polka dots, each dot the same size and evenly spaced like a military drill team. The thumb ties it all together with diagonal stripes meeting a half-moon of dots at the cuticle. The effect is sharp, graphic, and giving major “I just stepped out of a manga panel” energy.
This is the design that made me fall in love with the stripes-and-dots combo in the first place. (And honestly? It was love at first sight, and I’m not even sorry.) There’s something so deeply satisfying about the extreme order of this manicure—every stripe is straight, every dot is round, and together they create this visual rhythm that is almost hypnotic to look at. I literally gasped when I first saw this on a fashion editor’s Instagram because it was so clean, so precise, and so incredibly cool.
This design is for the girlies who appreciate structure, who organize their apps by color, who get genuinely excited about a fresh notebook. (We see you, and we are you.) It’s also surprisingly versatile—the black-and-white palette means it goes with literally everything in your wardrobe. Picture this at a design conference, a gallery opening, or honestly just while you’re answering emails and your hands look like they belong to a very important creative director.
How to Style It:
- Polish shade: Crisp white and jet black only. No gray, no cream, no off-white. This design demands precision and purity.
- Application technique: Use striping tape to create perfectly straight vertical lines on the striped nails. For the dotted nails, use a dotting tool to place uniform dots in a grid pattern—measure by eye or use a tiny piece of tape as a spacing guide. The thumb requires careful taping for the diagonal-to-dots transition.
- Complementary accessory: A structured black blazer, geometric silver jewelry, or anything clean and modern. This is a very “architect” look, so dress like you design buildings.
- Difficulty level: Looks hard AF but trust me, you’ve got this. The striping tape does the precision work for you, and a steady hand is all you need for the dots.
📸 Picture This: You’re presenting a design deck in a glass-walled conference room, and as you gesture toward the screen, your black-and-white striped and dotted nails catch the light, causing a client to pause mid-sentence and ask if your nails were “designed by a graphic designer because the composition is incredible.”
2. Rainbow Stripes + White Dots (That Are Giving “Carnival Meets Cloud”)
A hand with long coffin nails, each one featuring a different bold base color—hot pink, electric orange, sunshine yellow, lime green, and cobalt blue. On the colorful bases, thin white stripes run vertically like carnival tent poles. Over the stripes, large white polka dots are scattered randomly, overlapping the stripes and creating a layered effect that feels like a party exploded on your fingertips. The overall vibe is joyful, chaotic, and giving major “I am the entire parade” energy.
If you want a manicure that radiates pure joy and makes strangers smile at you on the subway, rainbow stripes with white dots is your answer. (I’m talking serotonin on a nail. I’m talking the kind of manicure that gets you through a Monday. I’m talking main character energy in its most colorful form.) The combination of vertical stripes with scattered dots on top creates this incredible depth and movement that flat single-pattern nails just can’t compete with.
I saw this design on a Pride parade nail art roundup, and I literally screamed. (Not figuratively. Actually made a noise. My neighbors probably heard.) The person wearing them had paired the nails with an all-white outfit, letting their hands do all the talking, and honestly? Icon behavior. This is for the girlies who don’t do beige, who think more color is always the answer, who want their manicure to be a conversation starter before they even open their mouths.
How to Style It:
- Polish shade: Five bold, saturated colors for the bases—think neon pink, orange, yellow, green, and blue. White for both the stripes and the dots.
- Application technique: Paint each nail a different base color. Use striping tape to create thin vertical white stripes. Once dry, use a large dotting tool to add white dots randomly over the stripes, letting some dots overlap the lines for a layered effect.
- Complementary accessory: An all-white outfit, silver jewelry, or anything that lets the nails be the star. Or lean all the way in and wear a rainbow. No rules here.
- Difficulty level: Looks hard AF but trust me, you’ve got this. The randomness of the dots means you can’t mess up the placement, and the stripes just need straight tape.
📸 Picture This: You’re at a Pride parade with your hands in the air, confetti falling around you, and your rainbow striped-and-dotted nails are so vibrant that the person next to you asks to take a photo specifically of your hands for their Instagram story.
3. Nautical Navy Stripes + Red Dots (That Are Giving “Yacht Life”)
A hand with short, round nails painted in alternating designs. Two nails feature crisp white bases with thin navy blue horizontal stripes, perfectly spaced like a classic Breton shirt. The other nails show a solid navy base covered in bright red polka dots, bold and cheerful against the dark background. The effect is clean, preppy, and giving major “I own a boat or at least know someone who does” energy. A gold anchor pendant and a navy blazer sleeve complete the very polished, very coastal aesthetic.
Nautical nails are a summer classic, but combining stripes AND dots in navy and red? That’s yacht-club chic with a personality upgrade. (I’m obsessed, and I’m not even trying to hide it.) The Breton stripe is one of the most timeless patterns in fashion, and when you pair it with red polka dots on navy, you get a manicure that feels both heritage-rich and playful. It’s like Coco Chanel and Minnie Mouse had a baby, and that baby grew up to have incredible nails.
I first saw this combo on a coastal grandmother aesthetic board, and I literally gasped because it was so perfectly summery without being basic. (That’s giving Pinterest goals, periodt.) This is for the girlies who love the ocean, who own at least one striped shirt, who think rosé is an acceptable beverage for any time of day. It’s clean, it’s classic, and it’s exactly what your hands need for a day on the water—or just a day when you want to feel like you’re on the water.
How to Style It:
- Polish shade: Navy blue, crisp white, and bright red. Keep the palette tight—this is a classic combo that doesn’t need extra colors.
- Application technique: Use striping tape for the horizontal navy stripes on white. For the dotted nails, paint a solid navy base and use a medium dotting tool for bright red dots. Keep the dots evenly spaced but not in a perfect grid—slight randomness feels more nautical and less mechanical.
- Complementary accessory: Gold jewelry, a straw bag, white jeans, or anything that screams “summer in the Hamptons.” Even if you’re actually just going to Target, commit to the fantasy.
- Difficulty level: Looks hard AF but trust me, you’ve got this. Horizontal stripes are actually easier than vertical ones because your nail bed is wider than it is tall. The dots are just there to add fun.
📸 Picture This: You’re on a boat deck holding a glass of rosé, and your nautical striped-and-dotted nails look so perfectly coastal that the captain asks if you’re “with the yacht club” because your manicure is giving serious boat-owner energy.
4. Pastel Stripes + Gold Dots (That Are Giving “Spring Brunch”)
A hand with medium-length almond nails, each one painted with soft, pastel horizontal stripes in alternating shades of lavender, mint green, baby pink, and butter yellow. Over the pastel stripes, tiny gold polka dots are scattered like decorative pins on a quilt, catching the light and adding warmth to the cool pastel palette. The effect is soft, dreamy, and giving major “I host garden parties and my aesthetic is very curated” energy.
Pastels and gold together are already a match made in heaven, but adding stripes AND dots to the equation? Now we’re talking about a manicure that belongs on a tea party table next to macarons and peonies. (I’m literally obsessed, and I need you to feel the same way so we can start a movement.) The horizontal pastel stripes create a soft base, and the gold dots on top act like little highlights that make the whole design feel expensive and intentional.
I saw this on a wedding shower nail inspiration post, and I literally could not even handle how perfect it was for spring. (TikTok made me do it, and now I have pastel polishes in every shade imaginable. My wallet is crying, but my nails are thriving.) This is for the soft girlies, the cottagecore enthusiasts, the ones who believe that every day should feel like a gentle spring morning. It’s romantic without being cheesy, and the gold dots keep it from feeling too sweet.
How to Style It:
- Polish shade: Four to five soft pastels—lavender, mint, pink, yellow, and peach. Metallic gold for the dots. Keep everything sheer and soft.
- Application technique: Use striping tape to create thin horizontal stripes in alternating pastel colors. Once dry, use a micro dotting tool to add tiny gold dots randomly across the stripes. The gold will catch light differently on each pastel shade, creating subtle variations in warmth.
- Complementary accessory: Pearl earrings, a white dress, delicate gold jewelry, or anything that feels light and feminine. This is a very “bride’s best friend” aesthetic.
- Difficulty level: Looks hard AF but trust me, you’ve got this. Pastel polishes can be streaky, so use high-quality formulas, but the stripes and dots themselves are very forgiving.
📸 Picture This: You’re holding a pastel macaron at a garden bridal shower, and your pastel striped-and-dotted nails match the dessert table so perfectly that the maid of honor asks if you “planned the whole look around your manicure.”
5. Diagonal Stripes + Scattered Dots (That Are Giving “Abstract Artist”)
A hand with long stiletto nails, each one a different deep jewel tone—emerald, sapphire, amethyst, ruby, and topaz. On each colored base, thick white diagonal stripes slash across the nail from corner to corner, creating a bold geometric foundation. Over the stripes, black and white polka dots of varying sizes are scattered like paint splatters, overlapping the stripes and landing in the open spaces between them. The effect is dramatic, artistic, and giving major “I sell paintings in a gallery downtown” energy.
Diagonal stripes are already bold, but adding scattered dots on top? Now you’ve got a manicure that looks like it belongs in a modern art museum. (And honestly? It should. These nails are art, and I will not be taking questions.) The diagonal lines create movement and energy, while the scattered dots add chaos and playfulness. Together, they create this incredible tension between order and randomness that makes people stop and stare.
I saw this design on an abstract nail art competition page, and I literally gasped because it was so fearless. (That’s giving main character energy, and I’m here for every second of it.) The person who created it used jewel tones, which made the whole thing feel rich and luxurious rather than messy. This is for the creatives, the artists, the girlies who don’t believe in rules and think “clashing” is just another word for “interesting.”
How to Style It:
- Polish shade: Deep jewel tones for the bases—emerald, sapphire, purple, red, and gold work beautifully. White for the diagonal stripes, and black and white for the scattered dots.
- Application technique: Paint your jewel-tone bases. Use tape placed diagonally across the nail to create thick white stripes. Once dry, use two different-sized dotting tools to scatter black and white dots randomly across the entire nail, letting some overlap the stripes and some land in the open spaces.
- Complementary accessory: Chunky silver jewelry, an all-black outfit, or anything that feels edgy and artistic. These nails demand a leather jacket or a gallery visit.
- Difficulty level: Looks hard AF but trust me, you’ve got this. The diagonal tape makes the stripes easy, and the scattered dots are impossible to mess up because there’s no pattern to follow.
📸 Picture This: You’re holding a glass of red wine at an art gallery opening, and your diagonal striped-and-dotted nails look so perfectly artistic that a stranger assumes you’re one of the exhibiting artists and asks about your “creative process.”
6. Thin Metallic Stripes + Matte Dots (That Are Giving “Texture Contrast Queen”)
A hand with long coffin nails painted in a velvety matte black base. On each nail, thin metallic silver stripes run vertically like delicate pinstripes on a tuxedo. Between the stripes, matte black dots of varying sizes are scattered, creating a texture-on-texture effect where everything is the same color but different finishes. The metallic stripes catch the light while the matte dots absorb it, creating a manicure that you almost need to touch to fully appreciate.
If you want a manicure that feels expensive, sophisticated, and slightly futuristic, metallic stripes with matte dots on black is your answer. (I’m talking CEO of a tech company energy. I’m talking “I arrive in a self-driving car and my nails cost more than your rent.” Not really, but that’s the vibe.) The single-color, multi-finish approach is what makes this design so clever—it’s not about color contrast, it’s about TEXTURE contrast, and that is next-level thinking.
I saw this on a red carpet nail look breakdown, and I literally could not even process how sleek it was. (TikTok made me do it, and now I’m a firm believer that matte and metallic should always be friends.) The thin metallic stripes elongate the nails while the matte dots add visual interest without clutter. This is for the minimalists who still want to feel edgy, the professionals who want nail art that works in a boardroom, the girlies who think less is more but still want MORE.
How to Style It:
- Polish shade: Matte black base. Metallic silver for the stripes. The dots are matte black on matte black, so you only need one matte black polish and one top coat that can do both matte and glossy finishes.
- Application technique: Paint all nails with matte black. Use striping tape to create thin vertical metallic silver stripes. Remove the tape immediately after painting. For the dots, use a dotting tool to place matte black dots between the stripes—use a matte top coat over the whole nail, then add glossy dots on top for contrast, OR apply glossy dots first and matte top coat everywhere except the dots.
- Complementary accessory: Silver jewelry, a tailored black outfit, or anything sleek and modern. These nails were made for power dressing.
- Difficulty level: Looks hard AF but trust me, you’ve got this. The trick is managing the matte and glossy finishes, but a careful top coat application makes it totally doable.
📸 Picture This: You’re shaking hands at a networking event, and as your matte-and-metallic striped-and-dotted nails catch the conference hall lights, the person you’re meeting pauses to compliment your “incredibly sleek and professional” manicure before you’ve even exchanged business cards.
7. Neon Stripes + Tiny Black Dots (That Are Giving “Rave Night Realness”)
A hand with long square nails painted in alternating neon bases—electric pink, highlighter yellow, toxic green, and blazing orange. On each neon base, thin black vertical stripes run from cuticle to free edge, creating a zebra-like but much more radioactive effect. Over the stripes, tiny black micro dots are scattered like digital noise or static, adding texture and edge to the already bold design. The effect is loud, unapologetic, and giving major “I am the party and the afterparty” energy.
Neon nails are already a statement, but adding black stripes AND black dots? Now you’re not just making a statement—you’re writing a manifesto. (And the manifesto says: “I am loud, I am proud, and my nails are visible from space.” Not literally, but close enough.) The black lines and dots ground the neon colors, keeping them from feeling too “raver cliché” and making the whole design feel more graphic and intentional.
I saw this on an EDM festival nail art roundup, and I literally screamed because it was so perfectly suited for a dark room full of lasers and bass drops. (That’s giving Pinterest goals for the party girlies, periodt.) This is for the night owls, the festival-goers, the ones who believe that sleep is for the weak and nail art is for the strong. It’s bold, it’s bright, and it’s exactly what your weekend needs.
How to Style It:
- Polish shade: Four neon colors for variety—pink, yellow, green, and orange. Jet black for both the stripes and the dots.
- Application technique: Paint each nail a different neon base. Use striping tape for thin black vertical stripes. Once dry, use the smallest dotting tool you have to scatter tiny black dots randomly across the nail, concentrating them more heavily near the cuticle and fading toward the tip.
- Complementary accessory: Black clothing, chunky platform boots, or anything that lets the neon pop. These nails are the outfit, so everything else should be background noise.
- Difficulty level: Looks hard AF but trust me, you’ve got this. Neon polishes are usually thick and opaque, which makes them easy to work with, and the black details are just lines and dots.
📸 Picture This: You’re in the middle of a crowd at a music festival, blacklight making your neon striped-and-dotted nails glow like actual radioactive material, while the person next to you points and yells over the bass that your nails are “literally glowing and it’s amazing.”
8. Horizontal Gradient Stripes + Gradient Dots (That Are Giving “Ombre Everything”)
A hand with long oval nails featuring a seamless horizontal ombre that fades from deep purple at the cuticle to pale lilac at the free edge. Over the ombre, thin white horizontal stripes follow the gradient, shifting from dense and dark near the cuticle to sparse and light near the tip. Scattered between the stripes, white polka dots vary in size to match the gradient—larger, denser dots near the purple base and smaller, sparser dots near the lilac edge. The effect is a fully gradient pattern manicure that is so cohesive it feels like it was designed by an algorithm.
If you love ombre nails but want to take them to the next level, gradient stripes with gradient dots is the design you didn’t know you needed. (But now you do, and I’m so sorry for what this knowledge will do to your nail polish budget.) This design uses the ombre base as a roadmap, with both the stripes and dots following the same fade pattern. The result is a manicure that feels incredibly intentional, almost mathematical in its beauty, and completely mesmerizing to look at.
I saw this on a nail math enthusiast’s page—yes, that’s a thing, and yes, it’s amazing—and I literally gasped because I’d never seen someone commit so fully to a gradient concept. (TikTok made me do it, and now I’m obsessed with ombre everything.) This is for the detail-oriented girlies, the ones who appreciate precision, who think good design is worth the extra effort. It’s elegant, it’s complex, and it’s exactly what you wear when you want your nails to look like they were designed by a very expensive algorithm.
How to Style It:
- Polish shade: Two shades in the same color family for the ombre—deep purple and lilac work beautifully. White for the stripes and dots.
- Application technique: Create a horizontal ombre using a makeup sponge. Once dry, use striping tape to place thin horizontal white stripes, varying the spacing to match the gradient—closer together near the dark end, further apart near the light end. Add white dots using two sizes: larger and denser near the cuticle, smaller and sparser near the tip.
- Complementary accessory: Delicate silver jewelry, a monochrome outfit in the same purple family, or anything that feels elegant and cohesive. These nails demand a unified aesthetic.
- Difficulty level: Looks hard AF but trust me, you’ve got this. The ombre is the hardest part, and once that’s done, the stripes and dots just follow the pattern.
📸 Picture This: You’re adjusting your sleeve at a formal dinner, and your gradient striped-and-dotted nails catch the candlelight so perfectly that the person seated next to you leans over to whisper that your nails look “like a mathematical work of art.”
Final Thoughts: Pattern Power
Stripes and polka dot nails are the ultimate proof that mixing patterns isn’t just allowed—it’s encouraged, celebrated, and absolutely iconic when done right. (Yes, queen, I said it, and I meant every word.) Whether you’re going for classic black-and-white graphic energy, rainbow carnival vibes, nautical chic, pastel brunch aesthetics, or neon rave realness, combining stripes with dots gives you a manicure that feels layered, intentional, and impossible to ignore.
The beauty of this combo is that both patterns are fundamentally simple—stripes are just straight lines, dots are just circles—but together they create visual complexity that looks like it took hours of professional work. (Spoiler: it didn’t have to. Striping tape and a dotting tool are all that stand between you and pattern perfection.) So stop choosing between stripes and dots. Have both. Be both. Live your best pattern-mixing life.
Which stripes and polka dot combo are you dying to try? Drop a comment and let me know your favorite number from the list! And if you recreate any of these designs, tag us in your nailfie because we absolutely need to see the pattern power. Share this with your pattern-loving besties too—best friends don’t let best friends choose just one design. Periodt.