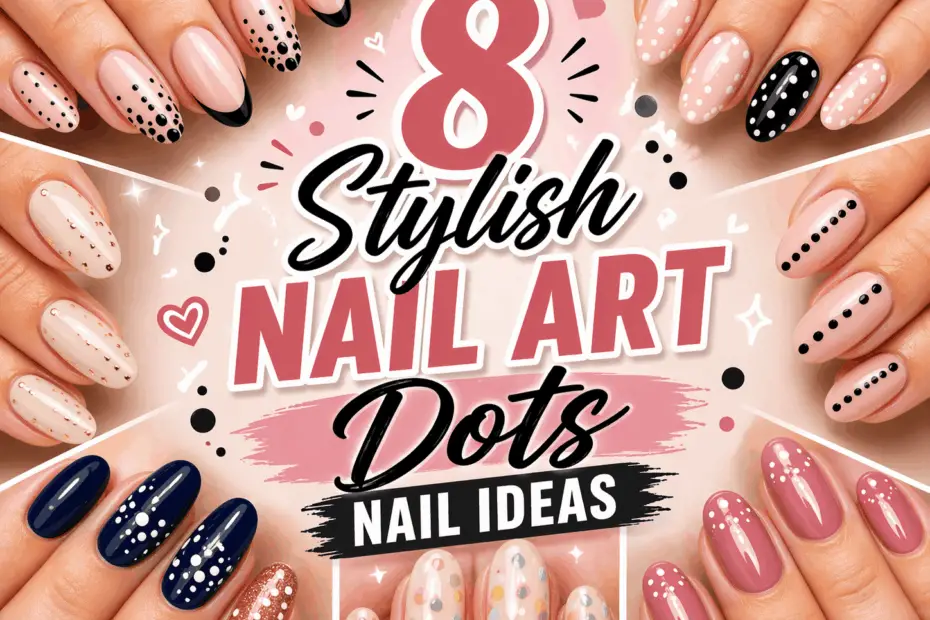
Bestie, we need to talk. If your nail game has been stuck in “solid color and maybe a glitter top coat if I’m feeling wild” territory, I have some very important news: stylish nail art dots are here to save your manicure from mediocrity. And not just any dots—we’re talking about the kind of dot designs that make people stop mid-sentence to stare at your hands.
The kind that get reposted on nail inspo accounts. The kind that have your group chat blowing up with “WHERE DID YOU GET THOSE DONE??” every single time you send a hand pic.
I’ve been in the nail art trenches lately. I’ve scrolled through approximately ten thousand Instagram posts. I’ve saved so many photos my phone storage is crying. I’ve tried designs that worked (chef’s kiss) and designs that absolutely did not (we don’t speak of the “abstract splatter” incident). And through all of this research and experimentation, one truth has emerged: dots are the ultimate style chameleon.
They can be elegant. They can be edgy. They can be playful, sophisticated, quirky, or classic—all depending on how you place them, size them, and color them. It’s genuinely wild how versatile one simple shape can be.
The stylish nail art dots trend is exploding right now because it bridges the gap between “I want cool nails” and “I don’t want to spend four hours painting tiny masterpieces.” Most dot designs are surprisingly achievable at home.
You don’t need a degree in fine art. You don’t need a cabinet full of tools. You need polish, something round to dip in it, and a vision. That’s it. And the results? They look like they walked straight out of a high-end salon.
So I curated the absolute best of the best for you. Eight stylish nail art dots designs that cover every vibe, every season, every personality type. Whether you’re a minimalist queen or a maximalist icon, a soft girl or a dark academia scholar, there’s a dot look on this list with your name written all over it.
Grab your polishes, put on a podcast, and let’s turn your nails into the main character. Let’s get into it.
1. Art Deco Dot Fan (That Gives 1920s Glamour With A Modern Twist)
Her hand waves gracefully while holding a champagne coupe, the nails painted in a deep emerald base with a fan-shaped arrangement of gold dots at the cuticle edge. The dots radiate outward like a peacock’s plumage, and the effect is so Gatsby-esque you can practically hear jazz playing in the background.
There is something undeniably glamorous about the Art Deco era, and translating that energy onto your nails is pure genius. The Art Deco dot fan takes the geometric, sunburst patterns of the 1920s and simplifies them into a dot formation that’s actually achievable without a professional nail artist on speed dial. You start with a rich, saturated base—emerald, navy, burgundy, black—and then create a fan of dots at the base of the nail that radiates outward toward the tip. The dots are usually metallic gold or silver, and they’re arranged in rows that get progressively wider as they move away from the cuticle.
I saw this on a vintage fashion account and literally gasped. The nails were deep green with gold dots, and the person was wearing a silk robe and holding a cigarette holder (it was a photo shoot, don’t worry). It looked like old Hollywood glamour bottled and applied to fingertips. And the best part? It’s just dots in a specific arrangement. No hand-painted filigree, no 3D embellishments, no Swarovski crystals that cost more than your rent. Just strategic dot placement creating maximum impact.
This stylish nail art dots design is trending because vintage glamour is having a major comeback. Everyone wants to feel like a starlet, and this design delivers that energy without requiring a vintage wardrobe or a time machine. Who would rock this? The girl who owns red lipstick in at least three shades. The one who knows all the words to “Singin’ in the Rain.” The one who says “darling” and somehow makes it sound natural. She’s timeless, she’s elegant, and her nails belong in a black-and-white movie close-up.
How to Style It:
- Polish Shade: “Cuckoo For This Color” by OPI (deep emerald) with “Good As Gold” dots. The green-gold combo is giving “I have a standing reservation at the jazz club.”
- Application Technique: Start with one dot at the center of the cuticle. Then add two dots slightly above and to each side. Continue adding rows, widening the fan shape as you move toward the middle of the nail. Use a medium dotting tool for consistency. Pro hack: use a piece of tape at the sides of your nail to keep the fan shape symmetrical.
- Complementary Accessory: A vintage-inspired bracelet or drop earrings with geometric patterns. Think sunbursts, chevrons, stepped shapes.
- Difficulty Level: Looks hard AF but trust me, you’ve got this. The fan shape is just rows of dots getting wider. It’s basically a triangle made of circles.
📸 Picture This: You’re at a Great Gatsby-themed party, holding a feathered headband, and someone asks if your nails are vintage reproductions from the actual 1920s.
2. Ombré Dot Fade (That Gives Sunset Energy On Your Fingertips)
Hands holding a tropical cocktail against a beach sunset, the nails displaying a gradient of dots that shift from dense and dark at the cuticle to sparse and light at the tips. The colors move from deep coral through peach to barely-there apricot, and each dot catches the golden hour light like a tiny jewel.
If you’ve ever watched a sunset and thought, “I wish I could wear that,” the ombré dot fade is your answer. This design takes the classic gradient trend and reimagines it entirely through dots. Instead of blending colors together, you use dots of different sizes and densities to create the fade effect. At the base of the nail, you’ve got larger, more closely packed dots in your darkest shade. As you move toward the tip, the dots get smaller and more spaced out, eventually fading into your lightest shade or even bare nail.
I first saw this on a travel blogger’s nails during her Maldives trip, and I was so mesmerized I took a screenshot and sent it to my best friend with the caption “I need this immediately.” The colors were coral to peach to cream, and they looked like someone had bottled a tropical sunset and applied it in dot form. It was dreamy, it was warm, it was giving vacation energy even though I was looking at it from my couch in sweatpants.
This stylish nail art dots design is trending because gradient nails never go out of style, but this dot version feels fresh and modern. It’s also surprisingly forgiving—if your fade isn’t perfectly smooth, the dot format hides it beautifully. Who would wear this? The girl who plans her outfits around golden hour photo ops. The one who owns four different bronzers and uses them all. The one who says “living my best life” in her captions and genuinely means it. She’s warm, she’s glowing, and her nails are a portable sunset.
How to Style It:
- Polish Shade: “Cajun Shrimp” → “Toucan Do It If You Try” → “Peach Side Babe” → “Bubble Bath” by OPI. The warm coral family creates the most satisfying sunset fade.
- Application Technique: Use three dotting tool sizes. Large dots at the base with your darkest color, medium dots in the middle, tiny dots at the tips. Space them further apart as you move up the nail. Pro hack: dip your tool, blot once on paper, then dot for a softer, more faded look.
- Complementary Accessory: Gold jewelry that catches the light—hoops, bangles, anything that reflects that sunset glow.
- Difficulty Level: Looks hard AF but trust me, you’ve got this. The gradient format forgives everything. An imperfect dot just looks like part of the sunset haze.
📸 Picture This: You’re at a beach bar at golden hour, holding a coconut drink, and the person next to you zooms in on your hands because “those sunset nails are everything.”
3. Negative Space Dot Constellation (That Turns Your Nails Into Star Maps)
Hands pointing up at a clear night sky, the nails almost entirely bare except for tiny white and silver dots arranged in constellation patterns. The natural nail shines through like a dark sky, and the dots are connected by the faintest lines, creating miniature star charts on each fingertip.
Sometimes the most striking nail art is the art that isn’t there. Negative space designs leave most of the nail bare, using the natural nail as the canvas and adding only strategic elements. The negative space dot constellation takes this philosophy and applies it to the night sky. Tiny dots—white, silver, maybe a touch of gold—are placed on a bare or clear-coated nail in patterns that mimic actual constellations or just feel star-like and celestial.
I discovered this design through a dark academia aesthetic board, and I immediately understood why it was getting so much love. It’s romantic, it’s intellectual, it’s giving “I know the names of the stars and I read poetry by moonlight.” And yet it’s incredibly simple to execute. You don’t need a base color. You don’t need complex techniques. You need clear polish, white polish, and a toothpick.
This stylish nail art dots design is trending because celestial aesthetics are huge right now. Astrology, astronomy, moon phases, star charts—people are obsessed with the night sky, and wearing it on your nails is the perfect way to embrace that vibe. Who would wear this? The girl who has her birth chart memorized. The one who journals by candlelight. The one who can identify Orion’s belt and gets emotional about it. She’s mystical, she’s romantic, and her nails are written in the stars.
How to Style It:
- Polish Shade: Clear base with “Alpine Snow” and “Set In Stone” by Essie for the stars. Add “Good As Gold” for one accent star per nail (your “North Star”).
- Application Technique: Use a toothpick for micro star dots. Place 5-7 dots per nail in a loose constellation shape. Connect some with the thinnest possible lines using a striping brush. Pro hack: use a matte top coat on the bare nail for a “night sky” texture, then glossy top coat only on the dots so they shine like actual stars.
- Complementary Accessory: A delicate moon phase necklace or tiny star studs. Keep it celestial and subtle.
- Difficulty Level: Looks hard AF but trust me, you’ve got this. Constellations don’t have to be astronomically accurate. Make up your own stars.
📸 Picture This: You’re at a planetarium date, looking up at the projected stars, and your date notices your nails match the ceiling and is genuinely moved by the detail.
4. Color-Blocked Dot Panels (That Brings Modern Art To Your Manicure)
Hands gesturing toward a painting in a white-walled gallery, the nails divided into bold color blocks with contrasting dots placed within each section. One half of the nail is hot pink with white dots, the other half is white with hot pink dots. The effect is graphic, contemporary, and giving “I collect art and I have opinions about it.”
Color blocking is a fashion staple that has finally made its way to nails in the most satisfying way possible. The color-blocked dot panels design divides each nail into distinct sections of solid color and then fills each section with dots in the opposite color. The contrast is sharp, the geometry is bold, and the overall effect feels like a piece of modern art that happens to be wearable.
I saw a version of this at an actual art gallery opening (in a photo, I’m not that fancy), and the wearer was an art critic who had apparently done her nails herself the night before. They were half mustard yellow, half navy blue, with white dots on the yellow and yellow dots on the navy. It looked like a Mondrian painting had a baby with a polka dot convention, and the baby was gorgeous. I was obsessed.
This stylish nail art dots design is trending because color blocking is huge in fashion right now, and nails are catching up. When your outfit is head-to-toe color-blocked, your nails should match that energy. It’s bold, it’s confident, it’s giving “I make deliberate choices and I stand by them.” Who would rock this? The girl with the gallery membership. The one who reads art criticism for fun. The one who says “that’s a very interesting composition” at museums. She’s cultured, she’s bold, and her nails are wearable modern art.
How to Style It:
- Polish Shade: “The “It” Color” (mustard) and “Lincoln Park After Dark” (navy) by OPI. Use the opposite color for dots in each section.
- Application Technique: Use striping tape to create clean color-block lines. Paint one section, let dry, remove tape, paint the other. Once fully dry, dot in the contrasting color. Pro hack: for a softer version, use tonal colors from the same family instead of high-contrast shades.
- Complementary Accessory: A statement piece that echoes one of your nail colors—maybe a necklace or bag in the same mustard or navy.
- Difficulty Level: Looks hard AF but trust me, you’ve got this. The tape creates the hard lines. You just fill in the spaces and dot.
📸 Picture This: You’re at an art opening, pointing at an abstract piece, and the artist themselves asks if your nails are a companion to their exhibition.
5. Pearl-Embellished Dot Clusters (That Gives Mermaid Princess Energy)
Hands resting on the edge of a boat railing, the nails painted in soft seafoam and lavender with clusters of pearlescent white dots that shimmer like actual pearls. The dots are slightly raised, giving a 3D effect, and the whole manicure looks like something a sea queen would wear to a coral court.
Pearls are timeless, but pearl-inspired dot clusters feel completely fresh. This design uses pearlescent or iridescent white dots placed in small clusters on soft, ocean-inspired bases. The key is the finish: the dots need to have that opalescent, slightly shifting quality that real pearls have. When the light hits them, they glow. When you move your hands, they catch the light differently. It’s mesmerizing.
I tried this for a beach vacation and felt like an absolute goddess the entire time. My base was seafoam green, and the dots were a pearlescent white that looked almost pink in some lights and almost blue in others. I caught myself staring at my own hands while waiting in line for ice cream. The person behind me probably thought I was having a moment. I was. It was a pearl-dot moment.
This stylish nail art dots design is trending because iridescent and pearlescent finishes are everywhere right now. From makeup to fashion to home decor, that shimmery, light-catching quality is having a major moment. And on nails? It’s pure magic. Who would wear this? The girl who owns at least one seashell-shaped item. The one who listens to ocean sounds to fall asleep. The one who describes colors as “beachy” and “shell-like.” She’s dreamy, she’s ethereal, and her nails belong in an underwater palace.
How to Style It:
- Polish Shade: “Mermaid’s Tears” by OPI (seafoam) with “Pearl of Wisdom” for the dots. The pearlescent finish is non-negotiable for this vibe.
- Application Technique: Use a medium dotting tool for consistent pearl-sized dots. Cluster 3-5 dots on each nail in a loose triangle or gentle curve. Pro hack: for extra dimension, mix a tiny bit of white shimmer powder into your dot polish before applying.
- Complementary Accessory: Pearl drop earrings or a delicate shell pendant. Keep it ocean-inspired and elegant.
- Difficulty Level: Looks hard AF but trust me, you’ve got this. The pearl effect is mostly in the polish choice, not your technique.
📸 Picture This: You’re on a boat trip, wind in your hair, and the captain’s first mate asks if your nails are inspired by the pearls divers find in these waters.
6. Retro Polka Dot Tips (That Gives Vintage Pin-Up Energy)
Hands adjusting a silk scarf tied around the neck, the nails painted in a classic red with white polka dots concentrated at the tips, creating a dotted French manicure effect. The design is playful, retro, and giving “I have a victory roll in my hair and I’m about to bake a pie from scratch.”
There’s a reason retro fashion never truly goes out of style: it’s fun, it’s feminine, and it makes people smile. The retro polka dot tips design channels that 1950s pin-up energy into a manicure that’s cheerful, flirty, and surprisingly modern. You start with a classic base—red, navy, or black—and then add white polka dots concentrated at the tips, almost like a dotted version of a French manicure. The dots can be perfectly arranged or slightly scattered for a more playful feel.
I saw this on a rockabilly fashion account and instantly felt happier. The nails were cherry red with perfect white dots at the tips, and the person was wearing a polka dot dress that matched. It was cohesive, it was joyful, it was giving “I woke up feeling cute and I decided to commit to the bit.” And honestly? We should all commit to the bit more often.
This stylish nail art dots design is trending because vintage and retro aesthetics are having a huge resurgence. From 50s-inspired fashion to mid-century modern home decor, people are craving the optimism and playfulness of past eras. And what better way to embrace that than with polka dot nails? Who would rock this? The girl who owns at least one vintage dress. The one who knows how to do a cat eye flick in under a minute. The one who says “honey” and “sugar” like she’s in a 1950s diner. She’s retro, she’s radiant, and her nails are a time machine.
How to Style It:
- Polish Shade: “Big Apple Red” by OPI with “Alpine Snow” dots. The classic red-white combo is retro perfection.
- Application Technique: Paint your base color and let dry. Then place dots at the tip area only—don’t dot the entire nail. Arrange them in neat rows for a classic look, or scatter them for a more casual vibe. Pro hack: use a piece of tape across the nail as a guide for where the “tip” area begins.
- Complementary Accessory: A silk scarf, cat-eye sunglasses, or anything that screams “vintage glamour.” Commit to the aesthetic.
- Difficulty Level: Looks hard AF but trust me, you’ve got this. Tip-only dotting means less work than full-nail coverage, and retro style welcomes slight imperfection.
📸 Picture This: You’re at a retro-themed diner, flipping through a jukebox menu, and the waitress asks if your nails match the decor on purpose.
7. Asymmetric Dot Statement (That Gives Editorial Edge)
Hands holding a fashion magazine open to the editorial spread, the nails each featuring a different dot arrangement—one nail has a single bold dot, another has a scattered cluster, another has a diagonal line of dots, another has dots only on one side. Nothing matches, yet everything feels curated, like a gallery wall on your fingertips.
Editorial fashion thrives on controlled chaos, and the asymmetric dot statement brings that energy to your nails. Each nail gets its own unique dot composition. One nail might have a single oversized dot. Another might have a diagonal line of three. Another might have a scattered cluster near the cuticle. Another might have dots only on the left side. When you look at all ten nails together, they tell a visual story. When you look at each nail individually, it’s its own little artwork.
I discovered this through a Japanese nail artist who posted what she called “unplanned asymmetry,” and the comments section went absolutely feral. Everyone was saving it, tagging friends, trying to recreate it. It felt so fresh because it broke the rule that nails should “match.” Why should they match? Since when did matching become the goal? This design says “I don’t follow rules, I create visual interest.”
This stylish nail art dots design is trending because asymmetry is huge in fashion right now. Mismatched earrings, asymmetric hems, one-shoulder tops—it’s all about deliberate imbalance. Nails are finally catching up, and it’s about time. Who would wear this? The girl who changes her mind three times before leaving the house and somehow always looks amazing. The one who has “organized chaos” as a personality trait. The one who says “I don’t really do trends” while accidentally starting them. She’s unpredictable, she’s creative, and her nails are a masterclass in asymmetry.
How to Style It:
- Polish Shade: Pick a cohesive palette. “Lincoln Park After Dark,” “You’re Such a Budapest,” “Alpine Snow,” and “Good As Gold” work beautifully together. The cohesion comes from the colors, not the placement.
- Application Technique: Forget patterns. Look at each nail as its own canvas. Place dots according to instinct. One nail gets one big dot. Another gets five tiny ones. Another gets a diagonal line. Trust your eye. Pro hack: step back and look at all ten together before top coat. If one feels off, adjust it. It’s like editing a photo grid.
- Complementary Accessory: Mix-and-match rings of different styles and metals. The more eclectic, the better. Let your jewelry echo the asymmetry.
- Difficulty Level: Looks hard AF but trust me, you’ve got this. There is no wrong answer here. If you think it looks good, it looks good. Period.
📸 Picture This: You’re flipping through a fashion magazine at a coffee shop, and the person next to you assumes you’re the stylist because your nails look “very editorial.”
8. Monochrome Dot Story (That Shows One Color Can Carry Everything)
Hands resting on a charcoal cashmere blanket, the nails each painted in a different shade of the same color family—deep plum, berry, mauve, blush—with dots in contrasting tones from the same family. The monochrome story unfolds across ten nails, and the sophistication is giving “I have a wine cellar and I know my grapes.”
We have arrived at the final design, and I’m ending with something that proves limitation can be incredibly powerful. The monochrome dot story uses one color family—say, burgundy to blush—and tells its entire tale across your ten nails. Each nail has a different base shade within that family, and the dots are painted in a contrasting shade from the same family. The result is tonal, harmonious, and unexpectedly dramatic. From far away, it looks like a single color manicure. Up close, it’s a whole story.
I saw this on a fashion editor during fashion week, and I had to physically restrain myself from commenting “WHERE??” in all caps on her post. (I did it anyway. No response. I’m fine.) The subtlety was what made it so powerful. It didn’t scream for attention—it earned it through nuance and depth. That’s the kind of nail design that separates people with taste from people who just follow trends.
This stylish nail art dots design is trending because tonal dressing is huge in fashion, and nails are the natural next step. When your outfit is head-to-toe camel or charcoal, your nails should match that cohesive, curated energy. Who would rock this? The girl with the perfectly organized closet arranged by color. The one who can name the Pantone shade of anything she’s wearing. The one who drinks her coffee black and takes it seriously. She’s refined, she’s intentional, and her nails are a study in tonal mastery.
How to Style It:
- Polish Shade: For a wine story: “Malaga Wine” → “Berry Naughty” → “Got the Blues for Red” → “Dulce de Leche” by OPI. Use dots in the next shade lighter or darker.
- Application Technique: Paint each nail a different base shade. Once dry, use a medium dotting tool to add dots in a contrasting shade from your family. Keep dot placement consistent across all nails for unity. Pro hack: lay out all your polishes in order before starting to make sure your gradient flows smoothly from nail to nail.
- Complementary Accessory: One metal throughout—either all gold or all silver. Let the nails be the star without jewelry competition.
- Difficulty Level: Looks hard AF but trust me, you’ve got this. The limited palette means you literally cannot clash. It’s foolproof.
📸 Picture This: You’re at a wine tasting, swirling your glass thoughtfully, and the sommelier glances at your nails and says, “Now THAT is a color story.”
Final Thoughts
Bestie, we have covered GROUND today. From the vintage glamour of Art Deco fan dots to the ethereal glow of pearl clusters, from the celestial romance of constellation maps to the bold graphic energy of color-blocked panels—we have explored the full universe of stylish nail art dots. And I hope you’re walking away with at least one design that made your heart do a little flutter.
Here’s what I’ve learned from my deep dive into dot obsession: dots are never just dots. A dot can be a star, a pearl, a period at the end of a sentence, a piece of confetti, a rung on a ladder, a signature, a secret signal. The simplest shape in the world becomes infinitely complex when you start playing with size, color, placement, and finish. That’s the magic of nail art. That’s the magic of YOU bringing a vision to life on ten tiny canvases.
I want you to feel empowered to try these designs, but more importantly, I want you to feel empowered to adapt them. Swap the colors. Change the placement. Add glitter if you want to (I support you). Remove elements if they feel like too much. Your nails should feel like an extension of your personality, not a costume you’re wearing. The best nail art is the kind that makes you smile every time you catch a glimpse of it.
My bold statement: your next manicure is going to start conversations. Not because it’s the most elaborate or expensive, but because it’s the most thoughtfully YOU. And when someone asks for your manicurist’s number—whether that manicurist is a salon professional or just you with a dream and a bobby pin—you get to own that compliment. Because great nails don’t require a great budget. They require great taste, great vision, and the willingness to try.
So tell me—which stylish nail art dots design is calling your name? Are you going Art Deco glamour or retro pin-up? Are you painting constellations or color-blocking like a modern artist? Comment below, share your pick, and if you recreate any of these beauties, PLEASE show me because I am genuinely so invested in your nail journey now. Let’s fill the world with gorgeous dots, bestie. Your manicure moment starts now. 💅